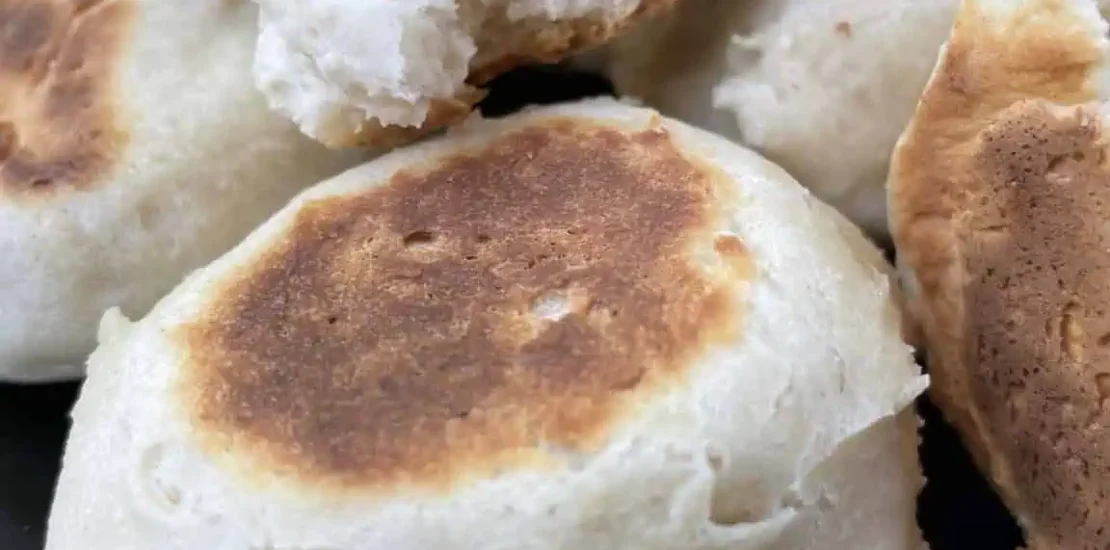
Forget the oven! Prepare to be amazed as your Blackstone griddle transforms humble biscuit dough into golden, flaky, tender biscuits with an impossibly crisp exterior. This isn’t just a clever hack; it’s a superior way to cook biscuits, yielding a distinct texture that’s soft and fluffy on the inside, yet wonderfully crusted on the outside from the direct, even heat of the griddle. Whether you’re making breakfast in the great outdoors or just want to free up oven space, biscuits on the Blackstone are a game-changer that will have you rethinking your baking methods.
Introduction: Griddle-Baked Goodness
The Blackstone griddle is renowned for its ability to sear, sauté, and smash, but its potential for baking is often overlooked. When it comes to biscuits, the griddle offers a unique advantage: direct, consistent heat across a flat surface. This allows the biscuits to cook evenly, developing a deep golden-brown crust that’s almost fried-like, while the interior remains incredibly tender and flaky. Using a dome during the cooking process creates a mini-oven effect, ensuring the biscuits cook through perfectly. Get ready to ditch your oven for this easy, delicious, and surprisingly efficient way to make biscuits.
Ingredients: Simple Staples, Stellar Results
The beauty of biscuits lies in their minimal ingredients. For griddle biscuits, the quality of these few components is key to achieving that perfect rise and texture.
For the Biscuits on the Blackstone Griddle:
-
Biscuit Dough:
-
1 (16.3 oz) can refrigerated biscuit dough (e.g., Pillsbury Grands! Flaky Layers or Southern Homestyle): The convenience of canned biscuits makes this recipe incredibly quick and easy. Look for biscuits that are designed to be flaky.
-
OR Homemade Biscuit Dough: If you prefer, prepare your favorite drop biscuit or rolled biscuit dough recipe. Ensure the dough is firm enough to handle and hold its shape.
-
-
Butter or Oil:
-
2 tablespoons unsalted butter, melted, or neutral oil (e.g., vegetable, canola, or avocado oil): For greasing the griddle and brushing the biscuits.
-
Why these specific ingredients?
-
Refrigerated Biscuit Dough: Offers unparalleled convenience and consistent results. The layers in flaky varieties crisp up beautifully on the griddle.
-
Butter/Oil: Essential for preventing sticking, promoting even browning, and adding flavor to the exterior of the biscuits. Butter, in particular, contributes a lovely golden color and rich taste.
How to Make Biscuits on the Blackstone Griddle: The Griddle-Bake Method
This method involves a two-stage cooking process: initial browning on the griddle, followed by “baking” under a dome to cook through.
Step-by-Step Guide:
-
Preheat the Blackstone Griddle:
-
Turn your Blackstone griddle to low to medium-low heat across all burners. You want a consistent, gentle heat.
-
Allow the griddle to preheat for 5-10 minutes. The surface should be warm but not scorching hot.
-
-
Prepare the Biscuits:
-
Open the can of refrigerated biscuits. Separate the biscuits and place them on a plate.
-
If using melted butter, brush the tops of the biscuits with a light coating. This helps with browning and flavor.
-
-
Griddle the Biscuits:
-
Add 1 tablespoon of melted butter or oil to a section of your preheated griddle. Spread it slightly.
-
Carefully place the biscuits onto the oiled griddle, leaving some space between each biscuit for even cooking and expansion.
-
Cook the biscuits for 4-6 minutes on the first side, or until they develop a beautiful golden-brown crust. Keep a close eye on them; if they are browning too quickly, lower the heat.
-
-
Flip and Dome:
-
Using a spatula, carefully flip each biscuit to cook the second side.
-
Immediately place a large, heat-proof dome (like a Blackstone basting cover or a large metal bowl) over the biscuits. This traps the heat, creating a mini-oven effect that allows the biscuits to cook through from the top.
-
Continue to cook for another 8-12 minutes under the dome, or until the biscuits are cooked through and deeply golden brown on both sides.
-
You can lift the dome periodically to check for doneness and rotate the biscuits if some areas of your griddle are hotter than others. The tops should be puffed up and feel firm to the touch.
-
-
Check for Doneness:
-
To ensure they are fully cooked, you can carefully break open one biscuit to check its center, or use an instant-read thermometer (it should read around 200-210°F / 93-99°C).
-
-
Serve and Enjoy:
-
Once perfectly golden and cooked through, remove the biscuits from the griddle and transfer them to a serving plate.
-
Serve warm with your favorite toppings like butter, jam, honey, gravy, or even as sandwich buns for breakfast sandwiches.
-
You Must Know: Mastering Biscuits on the Griddle
Achieving biscuit perfection on the Blackstone involves a few key insights.
-
Low and Slow Heat: This is paramount. If the griddle is too hot, the outsides will burn long before the insides cook through. Medium-low is usually the sweet spot.
-
The Dome is Non-Negotiable: Without a dome, the tops of the biscuits won’t cook properly, and you’ll end up with raw dough. The dome creates the necessary radiant heat.
-
Don’t Overcrowd: Give the biscuits space. This allows for even heat circulation and ensures each biscuit gets a nice crust.
-
Monitor Closely: Griddles can have hot spots, and cooking times can vary. Keep an eye on the biscuits, especially during the first side cook, and adjust heat or rotate as needed.
-
Flip Once: Resist the urge to constantly flip. Allow a good crust to form on each side before turning.
-
Butter the Griddle (and Biscuits): This prevents sticking and contributes to that desirable golden-brown exterior.
-
Canned Biscuits for Convenience: They are surprisingly good on the griddle and take out all the guesswork of homemade dough.
-
Know Your Biscuit Type: Flaky layer biscuits tend to crisp up particularly well, creating distinct, delicious layers.
Topping & Serving Variations: Beyond Butter and Jam
Biscuits are incredibly versatile!
-
Sweet Sensations:
-
Honey Butter: Mix softened butter with honey for a sweet spread.
-
Fruit Compote: Serve with warm berry compote or apple butter.
-
Cinnamon Sugar: Brush with melted butter and sprinkle with cinnamon sugar immediately after cooking.
-
-
Savory Delights:
-
Sausage Gravy: The ultimate pairing for a hearty breakfast.
-
Breakfast Sandwiches: Split open and fill with scrambled eggs, cheese, bacon, or sausage. Cook the egg and meat right on the griddle too!
-
Pulled Pork Sliders: Use as buns for mini pulled pork sandwiches.
-
Chicken and Biscuits: Serve as a side for griddled chicken.
-
Jalapeño Cheddar: If using homemade dough, mix in shredded cheddar and finely diced jalapeños for a savory kick.
-
Make It A Meal: Completing Your Griddle Breakfast
Biscuits are a fantastic anchor for a full breakfast or brunch spread, all cooked on your Blackstone!
-
Griddled Eggs: Scramble, fry, or make omelets alongside the biscuits.
-
Crispy Bacon or Sausage: Cook bacon strips or sausage patties on another section of the griddle.
-
Hash Browns: Make a batch of crispy griddle hash browns.
-
Griddled Fruit: Sauté some sliced apples or peaches with cinnamon for a sweet side.
-
Coffee and Juice: The essential breakfast beverages.
Pro Tips for Perfection
-
Dome Size: Ensure your dome is large enough to cover all the biscuits you’re cooking in a batch, with some room around them for heat circulation.
-
Preheat Adequately: Give the griddle time to heat evenly. This ensures consistent cooking.
-
Check Griddle Temperature: If you have an infrared thermometer, aim for a surface temperature around 300-325°F (150-163°C) under the dome for the “baking” phase.
-
Prevent Steam: If you lift the dome, try to do so quickly to minimize heat loss. A little moisture is fine, but you don’t want excess steam.
-
Use a Timer: While visual cues are important, a timer helps keep track of cooking times for each side.
-
Clean Between Batches: If cooking multiple batches, a quick scrape of the griddle will remove any butter residue or crumbs.
Recipe FAQs: Your Questions Answered
Q: Can I use homemade biscuit dough?
A: Yes! Roll and cut your homemade biscuit dough as usual. Ensure it’s not too wet or sticky. The cooking method (griddle and dome) will remain the same.
Q: My biscuits are burning on the outside and raw in the middle. What happened?
A: Your griddle heat is too high! Reduce the heat to low or medium-low. This allows the heat to penetrate and cook the inside before the outside gets too dark. Also, ensure you are using a dome.
Q: How do I know if they’re cooked through without cutting one open?
A: They should feel firm to the touch, be uniformly puffed up, and have a deep golden-brown color on both sides. An instant-read thermometer inserted into the center should read 200-210°F (93-99°C).
Q: Can I cook more than one can of biscuits at a time?
A: Yes, if your griddle and dome are large enough to accommodate them without overcrowding. You may need to cook in batches if you have a smaller griddle or dome.
Q: What kind of dome works best?
A: A sturdy metal basting dome designed for griddles works perfectly. A large metal mixing bowl turned upside down can also work in a pinch.
Q: Can I put anything on the biscuits before doming?
A: A light brush of melted butter is good. Avoid anything that will burn easily, like sugar, during the initial cooking. You can sprinkle cinnamon sugar on after they come off the griddle.
Q: How do I store and reheat leftover griddle biscuits?
A: Store cooled biscuits in an airtight container at room temperature for 1-2 days, or in the refrigerator for up to 3-4 days. Reheat briefly on a low-heat griddle, in a toaster oven, or a microwave until warm.

