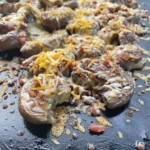
Welcome, culinary enthusiasts, to a journey into the heart of flavor, where the humble mushroom and the everyday onion transcend their ordinary forms to become something truly extraordinary. We’re talking about caramelized mushrooms and onions, a dish that whispers tales of deep umami, silken textures, and a sweetness born from patience and gentle heat. This isn’t just a side dish; it’s an experience, a versatile component that elevates everything it touches. From a simple burger to a gourmet steak, from a rustic tart to an elegant pasta, these glistening gems are the secret weapon of many a chef and home cook alike. Prepare to unlock the magic within these two unassuming ingredients and transform them into a symphony of savory sweetness that will tantalize your taste buds and impress your guests.
Ingredients: The Building Blocks of Flavor
The beauty of caramelized mushrooms and onions lies in its simplicity. A few key ingredients, each playing a crucial role, come together to create a complex and satisfying flavor profile. Quality ingredients are paramount here, as their inherent flavors will be concentrated and highlighted during the caramelization process.
For the Caramelized Mushrooms and Onions:
-
2 tablespoons unsalted butter: The foundation of flavor, butter provides a rich, nutty base and helps achieve that beautiful golden-brown color.
-
1 tablespoon olive oil: Partnering with butter, olive oil contributes a delicate fruitiness and helps raise the smoke point of the fat, preventing burning.
-
2 large yellow onions (about 1.5 lbs), thinly sliced: Yellow onions are ideal for caramelization due to their higher sugar content, which develops into a deep, sweet flavor when cooked slowly. Thin, uniform slices ensure even cooking.
-
1 lb cremini mushrooms (baby bellas), sliced: Cremini mushrooms offer a robust, earthy flavor and a pleasing texture. Slicing them evenly promotes consistent caramelization. You can also use button mushrooms or a mix of wild mushrooms for varied flavor.
-
1 teaspoon fresh thyme leaves (or ½ teaspoon dried thyme): Thyme provides an aromatic, herbaceous note that complements the earthy mushrooms and sweet onions beautifully.
-
½ teaspoon salt, or to taste: Essential for seasoning and bringing out the natural flavors of the ingredients.
-
¼ teaspoon black pepper, freshly ground, or to taste: Adds a touch of warmth and subtle spice.
-
Optional: 1-2 tablespoons balsamic vinegar or red wine: A splash of vinegar or wine in the final stages adds a touch of acidity and depth, enhancing the overall complexity and helping to deglaze the pan.
-
Optional: ½ teaspoon sugar (or a pinch): While onions naturally caramelize, a tiny pinch of sugar can sometimes jumpstart the process, especially if your onions are less sweet. Use sparingly.
Why these specific ingredients?
-
Butter and Olive Oil: This combination offers the best of both worlds – the richness of butter and the slightly higher smoke point of olive oil. This ensures that the fats don’t burn before the onions and mushrooms are fully caramelized.
-
Yellow Onions: Their natural sweetness is crucial. Red onions can also work but will yield a slightly different flavor profile and color. White onions are less ideal as they have a sharper, less sweet flavor when caramelized.
-
Cremini Mushrooms: These provide a deeper umami flavor than white button mushrooms and hold their shape well during cooking. However, feel free to experiment with your favorite mushrooms!
-
Thyme: Its earthy, slightly peppery notes are a classic pairing with mushrooms and onions, adding an aromatic layer without overpowering the main ingredients.
-
Salt and Pepper: Fundamental seasonings that enhance all other flavors.
-
Balsamic Vinegar/Red Wine: These are flavor enhancers, providing a tangy counterpoint to the sweetness and adding a layer of sophistication.
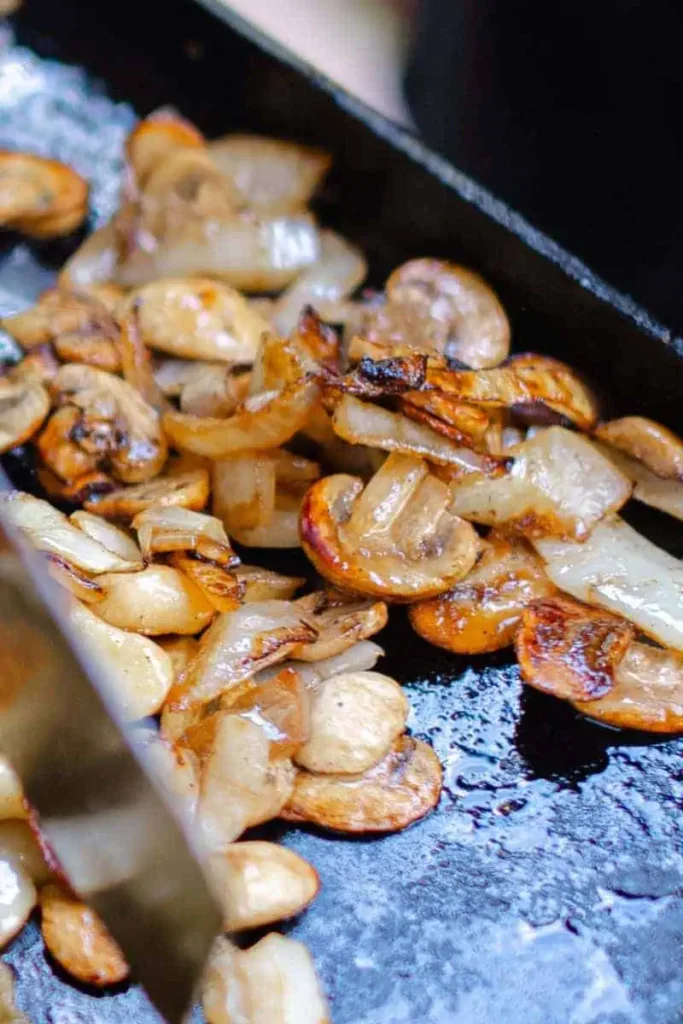
How to Caramelize Mushrooms and Onions: The Art of Patience
Caramelizing is not a quick process, but it’s a remarkably rewarding one. It’s all about low and slow cooking, allowing the natural sugars in the onions and mushrooms to break down and transform into a rich, sweet, and deeply savory concentrate.
Step-by-Step Guide:
-
Preparation is Key:
-
Slice the Onions: Peel the onions and cut them in half lengthwise through the root end. Place each half cut-side down on your cutting board. Using a sharp knife, slice them very thinly and uniformly from root to stem. Uniformity is important for even cooking.
-
Slice the Mushrooms: Gently wipe the mushrooms clean with a damp cloth (avoid washing them under water, as they absorb moisture easily and won’t caramelize as well). Trim off any tough ends of the stems. Slice them to a similar thickness as your onions.
-
-
Heat the Pan:
-
Choose a large, heavy-bottomed pan or Dutch oven. A wide surface area is crucial for allowing moisture to evaporate and for the ingredients to make good contact with the heat, promoting caramelization.
-
Place the pan over medium-low heat. Add the unsalted butter and olive oil. Allow the butter to melt completely and the oil to shimmer, ensuring the fat coats the bottom of the pan evenly.
-
-
Start the Onions:
-
Add the thinly sliced onions to the pan. They will seem like a lot, but they will cook down considerably.
-
Stir to coat all the onions with the butter and oil.
-
Add about half of the salt and pepper. This helps draw out moisture and begin the softening process.
-
Cook the onions, stirring occasionally (every 5-7 minutes), for about 15-20 minutes, or until they have softened significantly and become translucent. They should be releasing a lot of moisture during this initial stage. Don’t rush this part.
-
-
Add the Mushrooms:
-
Once the onions are soft and translucent, add the sliced mushrooms to the pan. They will also fill the pan, but will cook down.
-
Add the remaining salt, pepper, and the fresh (or dried) thyme.
-
Increase the heat slightly to medium. The mushrooms will release a lot of water. Continue to cook, stirring more frequently now (every 3-5 minutes), for another 10-15 minutes, or until the mushroom liquid has evaporated and they start to brown.
-
-
The Caramelization Process (The Patience Game):
-
Reduce the heat back to medium-low. This is the stage where the magic truly happens.
-
Continue to cook the mixture, stirring every 5-10 minutes. The goal is to allow the natural sugars to slowly caramelize without burning.
-
You’ll notice the onions and mushrooms starting to deepen in color, turning from pale yellow/brown to a rich golden, then a deep amber brown.
-
Scrape up any browned bits that form on the bottom of the pan – these are packed with flavor!
-
This process can take anywhere from 30-60 minutes after the initial softening and water evaporation, depending on your heat, pan, and desired level of caramelization.
-
If the mixture starts to stick excessively or brown too quickly, add a tablespoon or two of water, vegetable broth, or even a splash of wine/vinegar to deglaze the pan and loosen the fond (the browned bits). This also helps to slow down the browning. Repeat as necessary.
-
-
Finishing Touches (Optional):
-
Once the mushrooms and onions have reached your desired deep golden-brown color and have a rich, sweet aroma, you can add an optional finishing touch.
-
Pour in 1-2 tablespoons of balsamic vinegar or red wine. Stir well, scraping up any remaining browned bits from the bottom of the pan. Allow the liquid to reduce and evaporate, which will take just a couple of minutes. This adds a beautiful sheen and a tangy counterpoint.
-
Taste and adjust seasoning with more salt or pepper if needed.
-
-
Serve and Enjoy:
-
Remove from heat and serve immediately, or store for later.
-
You Must Know: Mastering the Art
Caramelizing is more of an art than a strict science, and understanding a few key principles will help you achieve perfection every time.
-
Patience is a Virtue: This cannot be stressed enough. Rushing the process will lead to burnt onions and mushrooms, not caramelized ones. Low and slow is the mantra.
-
The Right Pan Matters: A large, heavy-bottomed pan (like a cast-iron skillet, enameled Dutch oven, or a heavy stainless steel pan) is essential. It distributes heat evenly and prevents hot spots that can lead to uneven cooking and burning. Non-stick pans can work, but sometimes prevent the deep browning that develops flavor.
-
Don’t Overcrowd the Pan: If you have too many onions and mushrooms, they will steam instead of sauté and caramelize. If necessary, cook them in batches.
-
Moisture Management: The initial stages involve releasing moisture. Once that evaporates, the browning begins. If things get too dry and start to burn, a small splash of liquid (water, broth, wine, or vinegar) helps deglaze the pan and prevents scorching.
-
Scraping the Fond: Those browned bits that stick to the bottom of the pan (the “fond”) are pure flavor. Regularly scrape them up and incorporate them back into the mixture. This is where a lot of the deep, rich taste comes from.
-
Even Slicing: Uniformly sliced onions and mushrooms will cook at the same rate, preventing some pieces from burning while others are still raw.
-
Salt Early, Adjust Late: Adding salt early helps draw out moisture, which aids in softening. However, salt also concentrates as moisture evaporates, so always taste and adjust at the end.
-
The Maillard Reaction: The browning you see is due to the Maillard reaction, a complex chemical process between amino acids and reducing sugars that gives browned food its distinctive flavor. This reaction needs time and moderate heat to develop properly.
Topping Variations: Elevate Your Dish
While delightful on their own, caramelized mushrooms and onions are also a fantastic base for flavor variations.
-
Herbaceous Delight: Experiment with different herbs. Rosemary or sage can add a more rustic, earthy note. A touch of fresh parsley or chives at the very end can brighten the dish.
-
Spicy Kick: For those who enjoy a bit of heat, a pinch of red pepper flakes added with the mushrooms can provide a subtle warmth.
-
Garlic Infusion: Add 2-3 cloves of minced garlic during the last 10-15 minutes of cooking. Be careful not to add it too early, as garlic can burn easily.
-
Sweet and Tangy: A drizzle of maple syrup or a tiny spoonful of brown sugar (in addition to or instead of the optional sugar) can accentuate the sweetness. The balsamic vinegar finish is another excellent way to add tang.
-
Umami Bomb: A teaspoon of soy sauce or Worcestershire sauce added in the last few minutes can deepen the umami flavor.
-
Cheesy Goodness: Stir in a handful of grated Parmesan or Gruyere cheese at the very end for a creamy, cheesy finish.
-
Wine Reduction: Instead of just balsamic, try a splash of dry red wine (like Merlot or Cabernet Sauvignon) or even a dry sherry during the last 10 minutes of cooking. Let it reduce completely.
Make It A Meal: Beyond the Side Dish
Caramelized mushrooms and onions are incredibly versatile and can be the star of many dishes.
-
Gourmet Burgers and Sandwiches: Pile them high on a juicy beef burger, a chicken sandwich, or even a veggie burger. They also make a fantastic addition to a grilled cheese or a hot dog.
-
Steakhouse Quality: A classic pairing with grilled or pan-seared steaks, pork chops, or roasted chicken.
-
Bruschetta or Crostini: Spoon them over toasted bread with a dollop of goat cheese or ricotta for an elegant appetizer.
-
Pizza Topping: A sophisticated topping for a white pizza (with olive oil, garlic, and mozzarella) or a traditional tomato-based pizza.
-
Pasta Perfection: Toss them with freshly cooked pasta, a little pasta water, Parmesan cheese, and a drizzle of olive oil for a simple yet incredibly flavorful vegetarian meal.
-
Frittatas, Omelets, and Quiches: Incorporate them into egg dishes for a savory breakfast, brunch, or light dinner.
-
Stuffed Mushrooms: Use them as a filling for larger portobello mushrooms, perhaps with some breadcrumbs and cheese.
-
Savory Tarts and Galettes: Layer them into puff pastry or pie crust with some cheese for a rustic and delicious tart.
-
Mashed Potato Magic: Stir them into mashed potatoes for an elevated side dish.
-
Grain Bowls: Add a generous scoop to your favorite grain bowl with roasted vegetables and a protein source.
Pro Tips for Perfection
-
Don’t Wash Mushrooms: As mentioned, mushrooms are like sponges. Gently wipe them clean with a damp paper towel or a soft brush to remove any dirt.
-
Sharp Knife is Your Friend: A sharp knife makes slicing onions thinly and uniformly much easier and safer.
-
Control the Heat: Start with medium-low and adjust as needed. If you see rapid browning and signs of burning, lower the heat. If things are barely changing color after a long time, slightly increase the heat.
-
Listen to Your Pan: A gentle sizzle is good. A furious crackle means your heat is too high.
-
Deglazing is Key: Don’t be afraid to add a tablespoon or two of liquid (water, broth, wine, or vinegar) if the fond builds up too quickly and threatens to burn. This not only cleans the pan but also incorporates those caramelized bits back into the dish.
-
Taste, Taste, Taste: Season as you go, and always taste at the end to adjust salt, pepper, or other seasonings.
-
Batch Cooking: Caramelized mushrooms and onions freeze beautifully! Make a large batch and portion it out for future meals.
-
Storage: Store cooled caramelized mushrooms and onions in an airtight container in the refrigerator for up to 5-7 days. Reheat gently on the stovetop or in the microwave.
Recipe FAQs: Your Questions Answered
Q: Can I use different types of onions?
A: Yellow onions are best due to their high sugar content, which caramelizes beautifully. Red onions can also be used but will yield a slightly different color and flavor. White onions are generally not recommended as they are sharper and less sweet.
Q: Can I use different types of mushrooms?
A: Absolutely! Cremini (baby bellas) are a great choice, but white button mushrooms work well too. For a more gourmet touch, try a mix of wild mushrooms like shiitake, oyster, or chanterelles. Adjust cooking time as needed, as some mushrooms cook faster than others.
Q: How do I prevent the onions from burning?
A: The most important thing is to cook them over low to medium-low heat and stir them frequently, especially in the later stages. If they start to brown too quickly, reduce the heat, and if they start to stick, add a small splash of water or broth to deglaze the pan.
Q: How long does caramelization actually take?
A: For two large onions and a pound of mushrooms, expect anywhere from 45 minutes to 1.5 hours total cooking time, depending on the heat, your pan, and how deeply caramelized you want them. The initial softening takes about 15-20 minutes, then the real caramelization takes 30-60 minutes or more.
Q: Can I make this in advance?
A: Yes! Caramelized mushrooms and onions are excellent for meal prepping. They can be stored in an airtight container in the refrigerator for up to a week. They also freeze well for up to 3 months. Thaw in the refrigerator overnight and reheat gently.
Q: What’s the difference between sautéed and caramelized onions?
A: Sautéed onions are cooked quickly over higher heat until soft and translucent, perhaps lightly browned. Caramelized onions are cooked slowly over low heat for a much longer period, allowing their natural sugars to break down and turn into a deep, rich, sweet, and savory concentrate. The color is much darker, and the flavor is far more complex.
Q: Do I really need butter AND olive oil?
A: While you can use just one, the combination is often preferred. Butter adds a rich, nutty flavor, while olive oil has a higher smoke point, helping to prevent the butter from burning during the long cooking process.