There’s something undeniably satisfying about a perfectly seared smash burger. The crispy, craggy edges, the juicy interior, and the melted cheese all come together in a symphony of flavor and texture. While fancy burger joints often feature them, you can achieve that same incredible result right in your backyard with a griddle. Forget the flimsy patties and dry buns; we’re diving into how to create a smash burger that will make your taste buds sing.
Ingredients
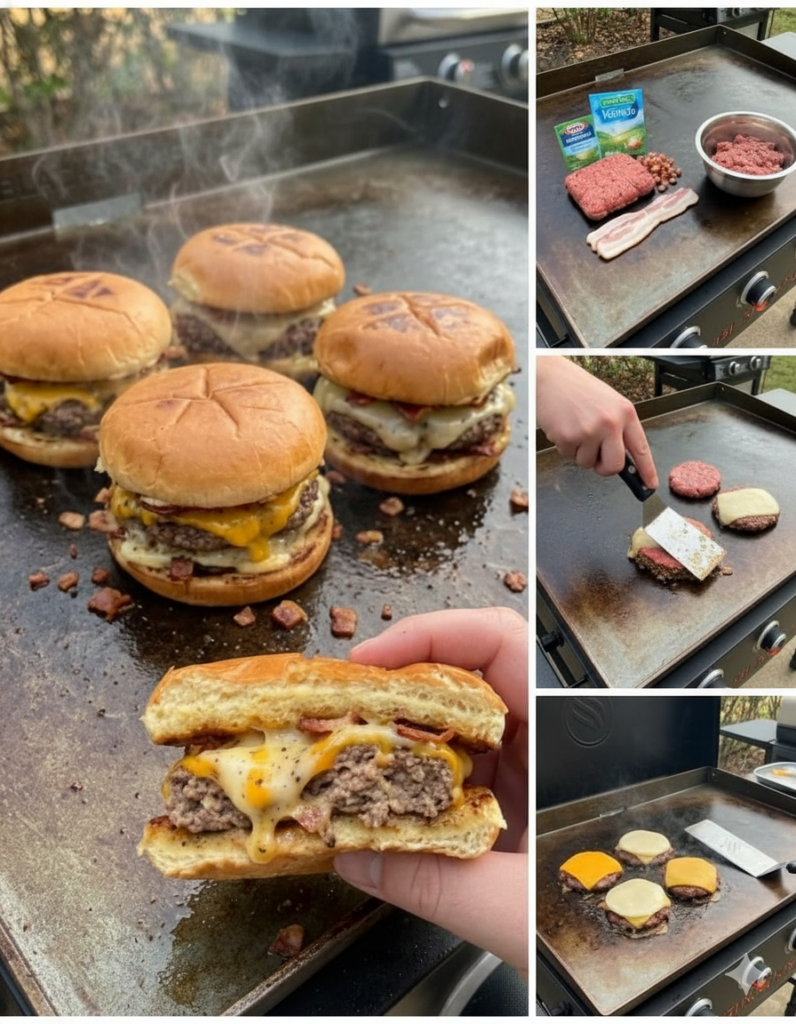
The beauty of a smash burger lies in its simplicity. High-quality ingredients are key!
-
Ground Beef: Approximately 2 lbs (900g) of 80/20 ground chuck is ideal. The fat content is crucial for juiciness and flavor, and it helps create those coveted crispy edges.
-
Buns: Brioche buns, potato buns, or even classic sesame seed buns work wonderfully. Slightly sweet and soft buns complement the rich beef.
-
Cheese: American cheese is the classic choice for its meltability, but cheddar, provolone, or Swiss are also great options.
-
Bacon (Optional): Sliced bacon, cooked until crispy.
-
Toppings (Your Choice):
-
Lettuce (iceberg or green leaf)
-
Tomato slices
-
Onion (red onion slices or caramelized onions)
-
Pickles (dill or bread and butter)
-
Sauces: Ketchup, mustard, mayonnaise, special burger sauce (see “Topping Variations” for ideas).
-
-
Butter or Oil: For toasting buns and cooking.
-
Salt and Pepper: Freshly ground black pepper and a good quality coarse salt (kosher or sea salt).
How To Make the Perfect Griddle Smash Burger
Follow these steps for smash burger perfection:
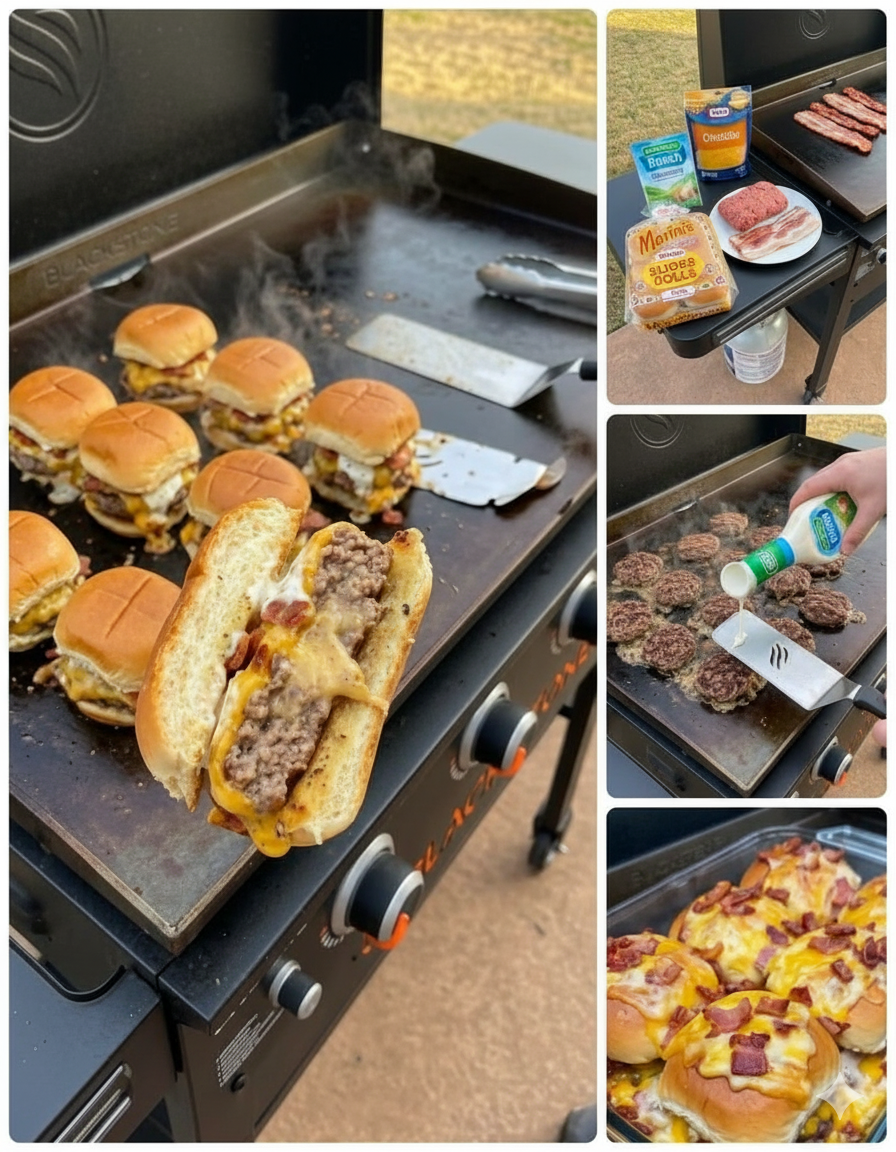
1. Prepare Your Patties:
* Divide your ground beef into loose balls, each weighing about 2-3 ounces (60-85g). Don’t pack them too tightly; loosely formed balls will smash better and create more surface area for searing. For a double smash burger, plan on two balls per burger.
* Season the top side of each beef ball generously with salt and pepper right before they hit the griddle.
2. Preheat Your Griddle:
* Turn your griddle on to medium-high to high heat (around 400-450°F or 200-230°C). You want it hot enough to get an immediate, hard sear. A smoking griddle is a good sign!
3. Toast the Buns:
* Lightly butter the cut sides of your burger buns.
* Place them butter-side down on the griddle for 1-2 minutes, or until golden brown and lightly toasted. Remove and set aside.
4. Cook the Bacon (If Using):
* If you’re adding bacon, cook it on the griddle until crispy. Remove and drain on paper towels. Keep the rendered bacon fat on the griddle; it adds amazing flavor.
5. Smash and Sear:
* Place a beef ball onto the hot griddle. Immediately, using a sturdy metal spatula or a dedicated burger press, firmly smash the ball down into a thin patty (about ¼-½ inch thick). Press down for about 10 seconds to ensure good contact with the hot surface. Do not smash more than once.
* Cook for 2-3 minutes on the first side, or until you see crispy, dark brown edges (the “crust” or “Maillard reaction”) and the meat is mostly gray on top.
* Flip the patty. Immediately place a slice of cheese on top.
* Cook for another 1-2 minutes, or until the cheese is melted and bubbly, and the patty is cooked through.
* Remove the cheesy patty from the griddle.
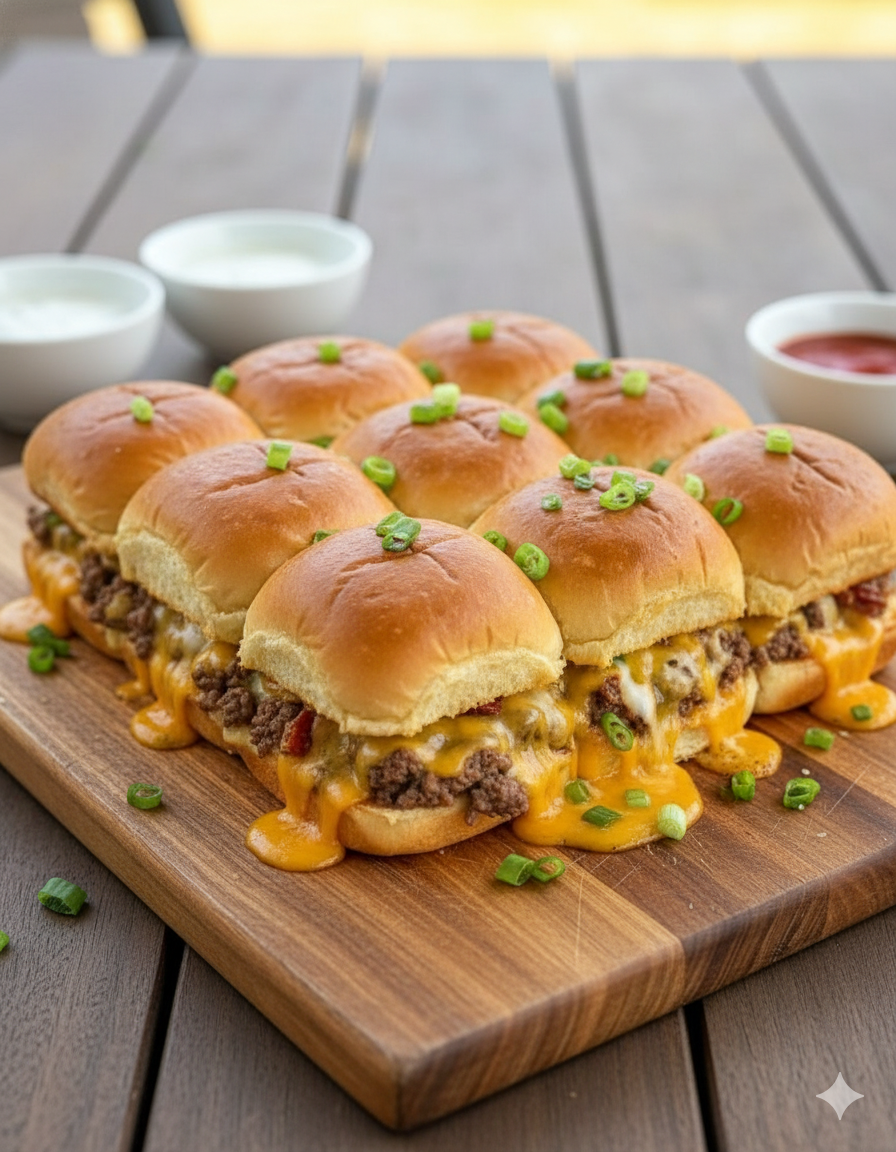
6. Assemble Your Burger:
* Place your cooked patty (or two for a double) onto the toasted bun.
* Add your desired toppings and sauces.
* Serve immediately and enjoy the crispy, juicy goodness!
You Must Know These Smash Burger Secrets
-
Don’t Overwork the Meat: The less you handle the ground beef, the better. Overworking makes the meat tough.
-
Heat is Your Friend: A screaming hot griddle is essential for that perfect sear and crispy crust. If your griddle isn’t hot enough, you’ll steam the burger instead of searing it.
-
Smash Early, Smash Once: The “smash” creates maximum surface area for the Maillard reaction, which is where all that incredible flavor comes from. Smash the patty within the first 30 seconds of it hitting the griddle, and only once. If you smash later, you’ll squeeze out too many juices.
-
The Right Tool for the Job: A sturdy, flat metal spatula or a dedicated burger press is crucial for getting a good smash. Using a thin spatula or your hand won’t achieve the same effect.
-
Season Generously: Don’t be shy with the salt and pepper on the exterior of the patty. This builds flavor and enhances the crust.
-
Don’t Forget the Buns: Toasted buns are non-negotiable! They provide structural integrity, prevent sogginess, and add a pleasant texture and flavor.
Topping Variations for Every Palate
While classic is great, don’t be afraid to experiment with your smash burger toppings:
-
Classic American: American cheese, shredded lettuce, tomato, onion, pickles, ketchup, mustard, mayo.
-
Bacon BBQ: Cheddar cheese, crispy bacon, fried onions, BBQ sauce.
-
Spicy Jalapeño: Pepper Jack cheese, pickled jalapeños, crispy fried onions, a drizzle of sriracha mayo.
-
Mushroom Swiss: Sautéed mushrooms and onions, Swiss cheese, a touch of Dijon mustard.
-
California Fresh: Provolone cheese, avocado slices, red onion, lettuce, tomato, a creamy aioli.
-
Breakfast Burger: Fried egg, American cheese, bacon, served on an English muffin.
-
“Animal Style” Inspired: American cheese, caramelized onions, shredded lettuce, extra pickles, and a special sauce (ketchup, mayo, relish, a touch of vinegar).
-
Southwest Fiesta: Monterey Jack cheese, salsa, guacamole, and a sprinkle of cilantro.
-
French Onion Style: Gruyere cheese, rich caramelized onions, and a smear of beef broth reduction or aioli.
Make It A Meal: Side Dish Pairings
Every great burger deserves a fantastic sidekick.
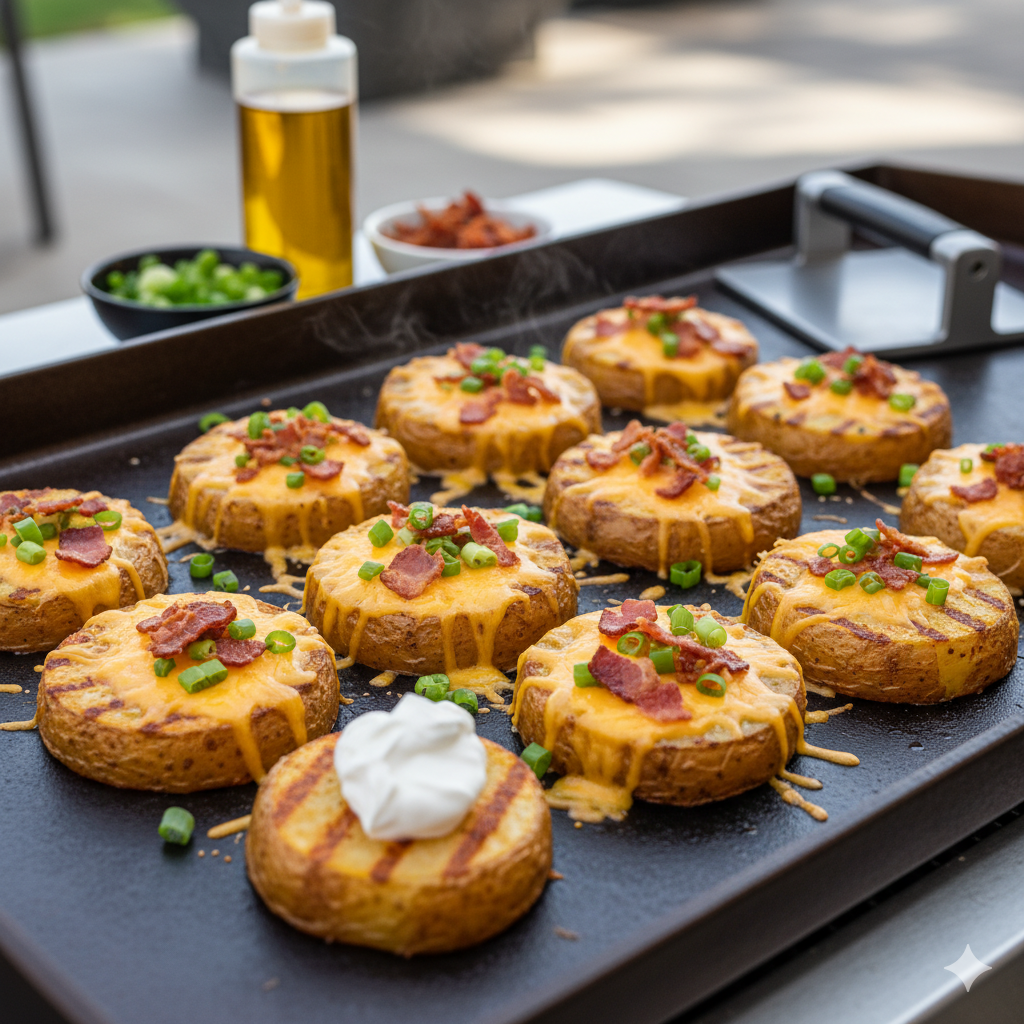
-
Crispy Griddle Fries: Cut potatoes into fries, season them, and cook them on the griddle until golden brown and crispy.
-
Onion Rings: Store-bought or homemade, cooked in an air fryer or deep fryer.
-
Coleslaw: A fresh, creamy, or vinegary coleslaw provides a nice contrast to the richness of the burger.
-
Side Salad: A simple green salad with a light vinaigrette is a refreshing option.
-
Sweet Potato Fries: A slightly healthier and sweeter alternative to regular fries.
-
Pickle Spears: Offer a tangy crunch that cuts through the richness.
-
Mac and Cheese: For the ultimate comfort food experience, pair your burger with a creamy mac and cheese.
Pro Tips for Griddle Gurus
-
Cleanliness is Key: Scrape your griddle clean between batches, especially if you have burnt bits. This prevents unwanted flavors and ensures a fresh cooking surface.
-
Use a Dome (Optional but Recommended): After flipping and adding cheese, place a metal dome or a sturdy pot lid over the patties for 30-60 seconds. This traps steam and helps the cheese melt perfectly and quickly.
-
Don’t Overcrowd the Griddle: Cook in batches if necessary. Overcrowding lowers the griddle temperature and can lead to steaming instead of searing.
-
Ventilation: If cooking indoors on a stovetop griddle, ensure good ventilation as there will be smoke.
-
Pre-mix Bacon into Patties: For an extra layer of flavor, finely chop cooked bacon and gently mix it into your ground beef before forming the balls.
-
Butter the Griddle: A little butter or a high-smoke-point oil (like avocado or grapeseed) on the griddle before smashing can enhance the crust and prevent sticking.
Recipe FAQs
Q: Can I use leaner ground beef?
A: You can, but it’s not recommended. The 80/20 fat content is crucial for the smash burger’s signature juicy texture and crispy edges. Leaner beef will result in a drier burger.
Q: What if I don’t have a burger press?
A: A sturdy, flat metal spatula (like a fish spatula) with a second spatula or a heavy pot on top for leverage will work. You just need something that can apply firm, even pressure.
Q: How do I prevent the patties from sticking to the smashing tool?
A: You can place a small piece of parchment paper or wax paper over the beef ball before smashing. Alternatively, oil the underside of your press or spatula.
Q: Can I make these in a cast iron skillet?
A: Absolutely! A cast iron skillet is excellent for smash burgers because it retains heat very well. Follow the same principles, cooking one or two patties at a time.
Q: How do I know when the burger is done?
A: For a thin smash burger, once it’s flipped, cheese is melted, and both sides have a good sear (about 1-2 minutes on the second side), it should be safely cooked through to a medium-well or well-done. Because they are so thin, they cook quickly.
Q: Can I prepare the beef balls ahead of time?
A: Yes, you can form the loose beef balls a few hours in advance and keep them covered in the refrigerator. Let them come to room temperature for about 15-20 minutes before cooking for the best results. Don’t season them until just before cooking.