Get ready to elevate your appetizer game or create the ultimate easy meal with these Mini Ham & Cheese Biscuit Sliders. Perfect for parties, game days, brunch, or a quick weeknight dinner, these sliders combine the comforting warmth of fluffy biscuits, savory ham, and melty cheese, all brought together with a delectable garlic butter glaze. Cooking them on a Blackstone griddle adds an extra layer of flavor and a beautiful golden crust that’s hard to achieve in a conventional oven, making them irresistibly good. Prepare for rave reviews and empty platters!
Ingredients
To craft these irresistible sliders, you’ll need a selection of fresh and flavorful ingredients. Quality components will truly make these sliders shine.
For the Mini Ham & Cheese Biscuit Sliders:
-
1 (16.3 oz) can refrigerated biscuit dough: Opt for flaky layers or Grands! style biscuits, which are larger and make for more substantial sliders. You’ll typically get 8-10 biscuits per can.
-
8-10 slices deli ham: Choose your favorite, such as honey ham, smoked ham, or Black Forest ham. Thinly sliced works best.
-
8-10 slices cheese: American, cheddar, provolone, or Swiss cheese slices are all excellent choices for melting. You can also use pre-sliced cheese squares.
For the Garlic Butter Glaze:
-
1/2 cup (1 stick) unsalted butter: Melted.
-
2-3 cloves garlic: Freshly minced for the best flavor.
-
1 tablespoon Worcestershire sauce: Adds a savory depth.
-
1 teaspoon Dijon mustard: Provides a subtle tang to balance the richness.
-
1/2 teaspoon onion powder: Enhances the savory notes.
-
1/4 teaspoon black pepper: Freshly ground preferred.
-
1 tablespoon fresh parsley, chopped (optional): For garnish and a pop of freshness.
-
Pinch of red pepper flakes (optional): For a touch of heat.
How To Make Mini Ham & Cheese Biscuit Sliders on the Blackstone Griddle
Preparing these sliders on the Blackstone griddle is straightforward and yields fantastic results. Follow these steps for perfect, golden-brown sliders every time.
Step 1: Prepare the Biscuits
-
Preheat the Griddle: Turn on your Blackstone griddle to medium-low heat. You want it warm enough to toast the biscuits without burning them quickly.
-
Open Biscuits: Carefully open the can of refrigerated biscuit dough.
-
Split Biscuits (Optional): If your biscuits are particularly thick (like the Grands! variety), you can gently split each biscuit horizontally in half to create thinner tops and bottoms. This allows for better ham and cheese distribution and faster cooking. If using smaller, thinner biscuits, you may not need to split them.
-
Place on Griddle: Place the split biscuit halves (or whole biscuits) directly onto the preheated griddle. Leave some space between them.
Step 2: Toast the Biscuits
-
Griddle Biscuits: Cook the biscuit halves for 2-4 minutes per side, or until they are golden brown and lightly toasted. Keep a close eye on them as they can brown quickly. You’re looking for a nice crust and a slight puffing.
-
Remove from Griddle: Once toasted, remove the biscuit halves from the griddle and set them aside on a plate. Keep the griddle on.
Step 3: Assemble the Sliders
-
Layer Ham and Cheese: Take one toasted biscuit bottom. Place a slice of ham on top, followed by a slice of cheese. You might need to fold the ham and cheese to fit the biscuit size.
-
Add More Ham and Cheese: Add a second layer of ham and another slice of cheese on top of the first. This creates a substantial, gooey filling.
-
Top with Biscuit: Place the toasted biscuit top over the cheese to complete your slider. Repeat with all remaining biscuits, ham, and cheese to create all your sliders.
Step 4: Prepare the Garlic Butter Glaze
-
Melt Butter: In a small, griddle-safe saucepan or a heat-resistant bowl placed on a cooler section of the griddle (or directly on the griddle if using a solid metal pan), melt the 1/2 cup of unsalted butter.
-
Add Glaze Ingredients: Once melted, stir in the minced garlic, Worcestershire sauce, Dijon mustard, onion powder, and black pepper. If using, add the red pepper flakes. Mix well until all ingredients are thoroughly combined. The mixture should be fragrant.
Step 5: Cook the Assembled Sliders on the Griddle
-
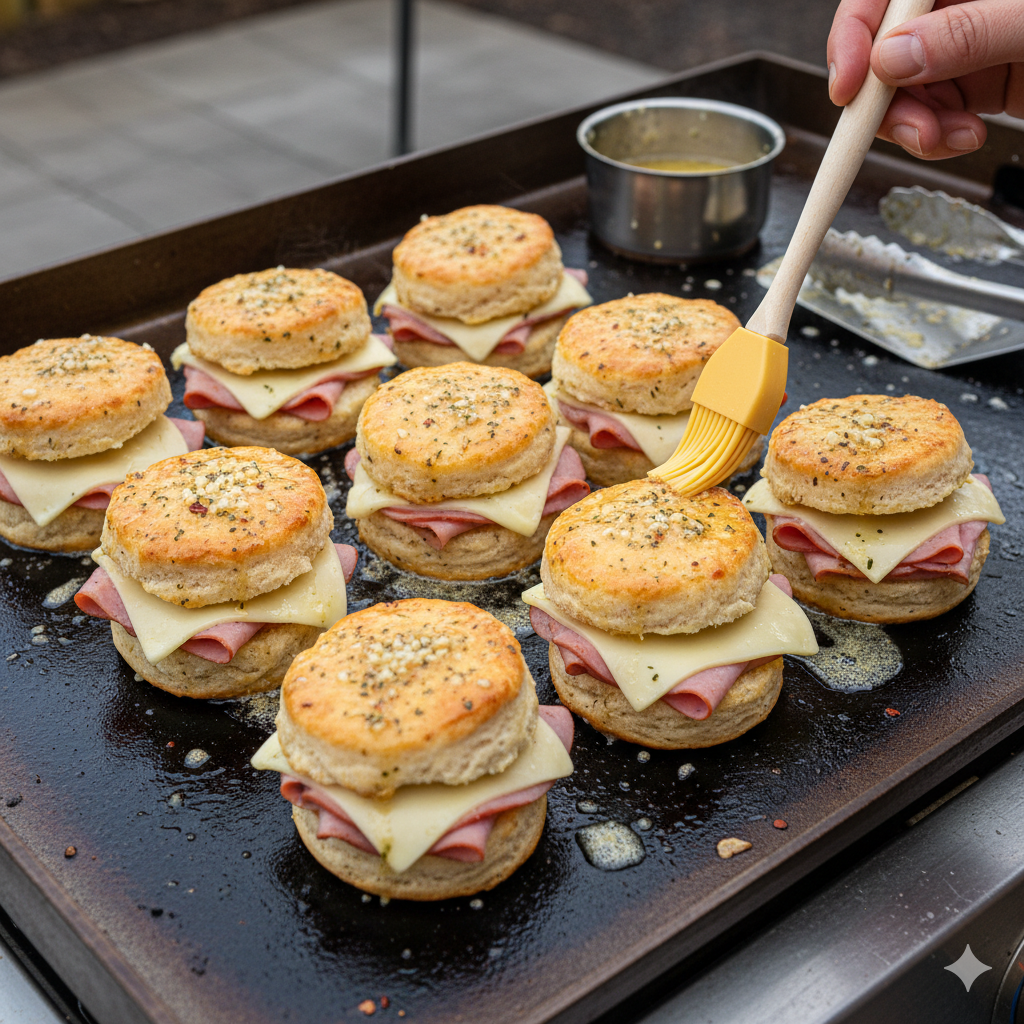
Brush Glaze: Arrange the assembled sliders back onto the griddle. Using a pastry brush, generously brush the tops and sides of each slider with the prepared garlic butter glaze. Don’t be shy – this glaze is key to the flavor!
-
Griddle and Melt: Cook the sliders on the griddle for 3-5 minutes, or until the bottom biscuit is nicely golden brown and crispy, and the cheese inside is beginning to melt and get gooey.
-
Flip and Brush: Carefully flip each slider to cook the other side. Brush the newly exposed tops (which were the bottoms) with more garlic butter glaze. Cook for another 3-5 minutes, or until that side is also golden brown and the cheese is fully melted and bubbly.
-
Optional: Cover to Melt Cheese: If your cheese isn’t melting quickly enough, you can place a dome-shaped lid or an inverted metal bowl over the sliders for a minute or two to trap heat and encourage faster melting.
Step 6: Finish and Serve
-
Remove from Griddle: Once the sliders are golden brown on both sides, and the cheese is beautifully melted, remove them from the griddle.
-
Garnish: Transfer the sliders to a serving platter. If desired, sprinkle with fresh chopped parsley for a burst of color and freshness.
-
Serve Immediately: These sliders are best enjoyed hot and fresh off the griddle while the cheese is still warm and gooey.
You Must Know
Achieving perfectly crispy and gooey sliders on the Blackstone griddle requires attention to a few key details. Understanding these nuances will ensure your sliders are a smashing success.
-
Griddle Temperature Control is Crucial: The Blackstone griddle can get very hot. For biscuits, you want medium-low to medium heat. Too high, and the biscuits will burn on the outside before the inside cooks or the cheese melts. Too low, and they won’t get that desirable golden crust. Experiment with your griddle’s settings.
-
Don’t Overcrowd the Griddle: While tempting to cook a whole batch at once, overcrowding the griddle can lower its surface temperature and lead to uneven cooking. Cook in batches if necessary, ensuring each slider has enough space to brown properly.
-
Split Biscuits for Evenness: Splitting the biscuits horizontally before toasting allows for more even cooking of the bread and ensures the ham and cheese are truly nestled between two distinct halves. This also prevents a super thick biscuit from overwhelming the filling.
-
The Glaze is Non-Negotiable: The garlic butter glaze isn’t just for flavor; it helps the biscuits get extra crispy and golden on the griddle, almost frying them slightly. Don’t skimp on brushing!
-
Use Good Melting Cheese: While any cheese can technically melt, some melt better than others. American, provolone, mild cheddar, or Monterey Jack are excellent choices because they become wonderfully gooey without separating or becoming oily.
-
Cook Ham Briefly (Optional): If you prefer your deli ham warmed through or slightly crisped, you can lightly sear the ham slices on the griddle for 30-60 seconds before assembling the sliders. This adds an extra layer of flavor and texture.
-
Utilize a Dome/Lid: If you find the cheese isn’t melting fast enough, especially on thicker sliders, placing a griddle dome or an inverted metal bowl over the sliders for a minute or two will trap the heat and steam, quickly melting the cheese to gooey perfection.
-
Serve Immediately: These sliders are at their absolute best when served hot off the griddle. The cheese is perfectly molten, the biscuits are crispy, and the glaze is fragrant. While leftovers are still good, the texture won’t be quite the same.
Topping Variations
While the classic ham and cheese is a winner, these sliders are incredibly versatile. Here are some ideas to customize your Mini Ham & Cheese Biscuit Sliders with delicious toppings and additions:
-
Savory & Spicy Kick:
-
Jalapeños: Thinly sliced fresh or pickled jalapeños added inside the slider for a spicy crunch.
-
Hot Honey: Drizzle a little hot honey over the finished sliders for a sweet and spicy glaze.
-
Spicy Mustard: Swap Dijon for a spicy brown mustard in the glaze, or offer it as a dipping sauce.
-
-
Sweet & Tangy Accents:
-
Pineapple Rings: A small, thin slice of grilled pineapple can add a fantastic sweet and tangy element, especially with ham.
-
Sweet Pickles/Bread & Butter Pickles: A few pickle chips inside the slider or on the side for a vinegary crunch.
-
Cranberry Sauce: A thin smear of cranberry sauce on one of the biscuit halves offers a festive and sweet contrast, particularly great with holiday ham.
-
-
Extra Umami & Depth:
-
Crispy Onions/Shallots: Store-bought crispy fried onions or homemade fried shallots sprinkled inside or on top for extra texture and flavor.
-
Bacon Bits: Real bacon bits (or freshly cooked, crumbled bacon) added with the ham and cheese for a smoky crunch.
-
Sun-Dried Tomatoes: Finely chopped sun-dried tomatoes (oil-packed, drained) mixed into the glaze or placed inside.
-
-
Herbs & Aromatics:
-
Everything Bagel Seasoning: Sprinkle over the tops of the glazed biscuits before the final cook for a boost of savory flavor and texture.
-
Fresh Rosemary or Thyme: Finely chop and add to the garlic butter glaze for a more herbaceous aroma.
-
-
Cheese Explorations:
-
Smoked Gouda: For a deeper, smoky flavor profile.
-
Pepper Jack: For an added layer of mild heat and excellent melt.
-
Cream Cheese: A thin smear of cream cheese on the biscuit can add extra creaminess and richness.
-
-
Garnish Options:
-
Sesame Seeds: Sprinkle over the glazed tops for a classic diner-style look and subtle nutty flavor.
-
Poppy Seeds: A traditional addition to many slider glazes, adding a subtle crunch.
-
Make It A Meal
While these sliders are perfect as an appetizer, they can easily be scaled up or paired with other dishes to create a satisfying meal.
-
Breakfast/Brunch Spread:
-
Serve alongside scrambled eggs, crispy bacon (cooked on the griddle!), breakfast potatoes, and fresh fruit for a hearty brunch.
-
Add a fried egg inside the slider before final cooking for an ultimate breakfast sandwich.
-
-
Casual Dinner:
-
Pair with a simple green salad with a light vinaigrette to cut through the richness.
-
Serve with a side of coleslaw, potato salad, or a cup of your favorite soup (like tomato or broccoli cheddar).
-
Add a side of crispy tater tots or french fries, also easily cooked on the griddle.
-
-
Game Day Feast:
-
These sliders are a touchdown for game day. Offer them with other crowd-pleasing snacks like chicken wings (also great on the griddle!), nachos, and a veggie platter.
-
Set up a “slider bar” with different ham types, cheeses, and optional toppings (pickles, jalapeños, various mustards) for guests to customize their own.
-
-
Kid-Friendly Lunch/Dinner:
-
A definite hit with kids! Keep the flavors classic for picky eaters.
-
Serve with apple slices, carrot sticks, and a dip for a balanced and fun meal.
-
-
Picnic or Potluck:
-
While best served warm, they still hold up well at room temperature for a short period. Pack them in an insulated container to keep them warm for gatherings.
-
-
Soup Dippers:
-
These sliders, especially with extra cheese, make fantastic dippers for creamy tomato soup or a hearty lentil soup.
-
Pro Tips
Mastering the Blackstone griddle for these sliders is all about technique. Here are some expert tips to ensure your sliders are a cut above the rest.
-
Preheat Thoroughly but Adjust for Biscuits: While many griddle recipes call for high heat, biscuits benefit from medium-low to medium. Give the griddle time to heat evenly, then dial it back slightly before adding the biscuits to prevent scorching.
-
Use a Griddle Press/Spatula: For perfectly flat and extra crispy biscuits, you can gently press down on the biscuit halves with a griddle press or the back of a wide spatula during the initial toasting phase.
-
Don’t Rush the Melt: Let the griddle do its work. The cheese needs consistent, gentle heat to melt beautifully. If you try to rush it with very high heat, the biscuit will burn before the cheese is gooey. The dome trick is your friend here.
-
The “Pan” on the Griddle Trick: If you don’t have a griddle-safe saucepan for your glaze, you can create a makeshift double boiler by placing a heat-safe bowl directly on a cooler part of the griddle, or by placing it in a small amount of water in a metal pan on the griddle.
-
Brush Both Sides: After flipping, remember to brush the newly exposed side (the original bottom) with more glaze. This ensures maximum flavor and a crispy texture on both biscuit halves.
-
Clean Between Batches: If cooking multiple batches, a quick scrape with your griddle spatula and wipe down with a paper towel can prevent accumulated crumbs from burning and sticking to the next batch.
-
Experiment with Biscuit Brands: Different biscuit brands will yield slightly different results. Some are flakier, some are denser. Try a few to find your favorite for sliders.
-
Warm Your Ham (Optional): If your ham is very cold, you can give it a quick minute on the griddle before assembly to bring it up to temperature. This will help the cheese melt faster when assembled.
-
Serve with Dipping Sauces: Offer a variety of dipping sauces on the side such as ranch, honey mustard, extra Dijon, or even a simple ketchup for customization.
Recipe FAQs
Got questions? Here are answers to common inquiries about making Mini Ham & Cheese Biscuit Sliders on the Blackstone Griddle.
Q: Can I use homemade biscuits instead of canned?
A: Absolutely! Homemade biscuits will be even more delicious. Ensure they are fully baked before slicing and proceeding with the recipe. You might need to adjust the griddle toasting time slightly.
Q: What if I don’t have a Blackstone griddle? Can I make these in the oven?
A: Yes, you can!
1. Preheat oven to 350°F (175°C).
2. Assemble sliders on a baking sheet.
3. Brush tops with glaze.
4. Bake for 15-20 minutes, or until biscuits are golden and cheese is melted and bubbly. You won’t get the same griddle-crispness, but they’ll still be delicious.
Q: Can I prepare these ahead of time?
A: You can assemble the sliders without the glaze and store them covered in the refrigerator for up to a few hours. Prepare the glaze just before cooking. They are best cooked and served fresh, as the biscuits can get soggy if left assembled too long before cooking.
Q: What kind of ham is best?
A: Thinly sliced deli ham works best. Honey ham, smoked ham, Black Forest ham, or even turkey ham are all great options. The key is thin slices for easy layering and melting.
Q: My biscuits are burning on the griddle. What should I do?
A: The griddle is likely too hot. Reduce the heat to medium-low. Also, ensure you are flipping them frequently and keeping an eye on them. The sugar in the biscuits can caramelize and burn quickly.
Q: Can I add vegetables to the sliders?
A: While these are typically simple, you can add very thin slices of bell pepper, finely minced onion (which will soften quickly), or spinach leaves. Be careful not to overload them, as this can make them hard to cook evenly.
Q: How do I store leftovers?
A: Store any leftover sliders in an airtight container in the refrigerator for up to 2-3 days.
Q: How do I reheat leftovers?
A: The best way to reheat is on the griddle (medium-low heat), in a toaster oven, or in an air fryer to help the biscuits crisp up again. Microwave reheating will make them soft.
Q: Can I use different cheeses?
A: Absolutely! Experiment with Monterey Jack, provolone, Swiss, or even a blend of cheeses. Just make sure they are good melting cheeses.
Q: What if I don’t have Worcestershire sauce or Dijon mustard?
A: While they add depth, you can omit them if necessary. The sliders will still be tasty with just butter, garlic, onion powder, and pepper. You could try a tiny dash of soy sauce in place of Worcestershire for umami, or a little yellow mustard in place of Dijon for a mild tang.